This BlogSpot, I'll publish some IT related software, news or experience. Any comments or suggestions are accepted. Feel free to look around! ^^

Showing posts with label Desktop. Show all posts

10 July, 2008

Hide your important folder (Part 2)

This post shows you how to make the folder invisible to hide files, while still get easy access to it. And now I have a part 2, which also hides folder while still get easy access to it, by using an App Launcher like Humanized Enso.


The App Launcher Humanized Enso has an interesting feature of "learning" new commands, and this is how we make use of it.

Step 1: Create a new folder
Step 2: Learn the new command
Step 3: Hide the folder


Step 1: Create a new folder
Just create a new folder and rename it as whatever you like. For example below, I name my new folder as "hidden files".
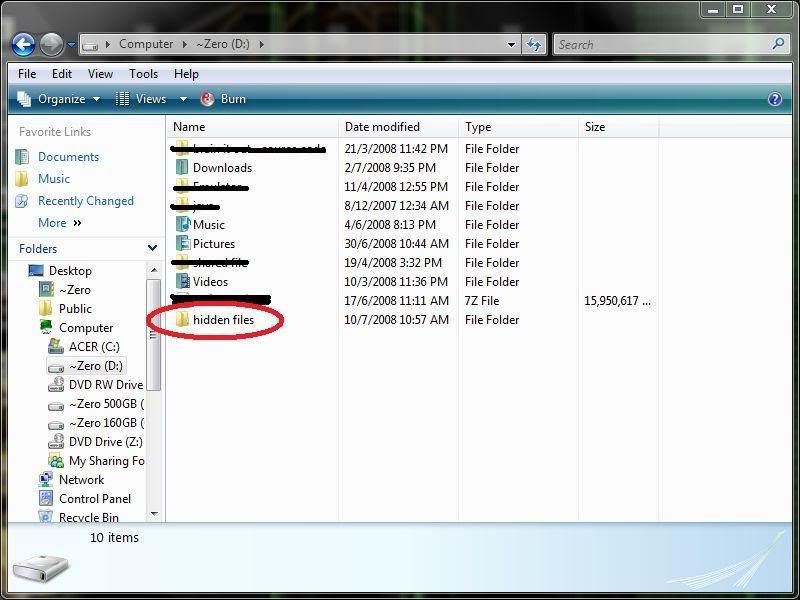
click to enlarge


Step 2: Learn the new command
Highlight the folder, open up Humanized Enso (by default is holding the CapsLock key), and learn as a new command, for example below I learn it as Open windows files. You would want the new command be hard to guess but easy to remember.

click to enlarge


Step 3: Hide the folder
Right click on the folder, choose properties. Under attribute, tick for hidden. Click on OK, done. The folder is now hidden, and yet you can simply access to the hidden folder by using the enso command you assigned just now.


More information on Make the folder invisible to hide "important" files.
More information on Humanized Enso

01 July, 2008

AveIconifier 2

This is a simple, free tool to convert whatever image you want into icon file(.ico), and you may apply it on your desktop icon or whatever.

Download site: WinMatrix

Although there stated that you can convert .png to .ico and vice-versa, I tried converting .jpg to .ico and it works still fine. These are some icons I created myself (edited from images from the web of course, those are folders for my school and office.)


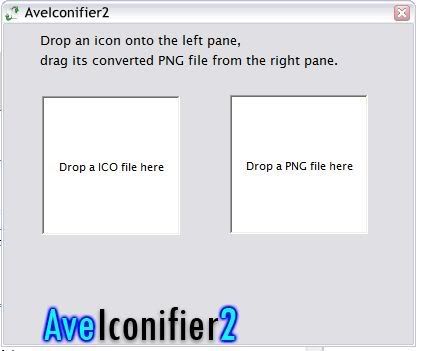
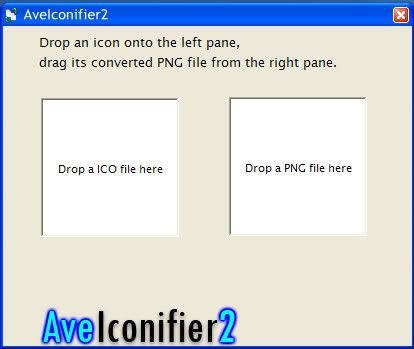
Below is a screenshot of the program (with a default skin, you can change the skin yourself, the download come with several skins. Check on the Tutorial on how to change the skin)

click to enlarge

So, how to use it? Simple.

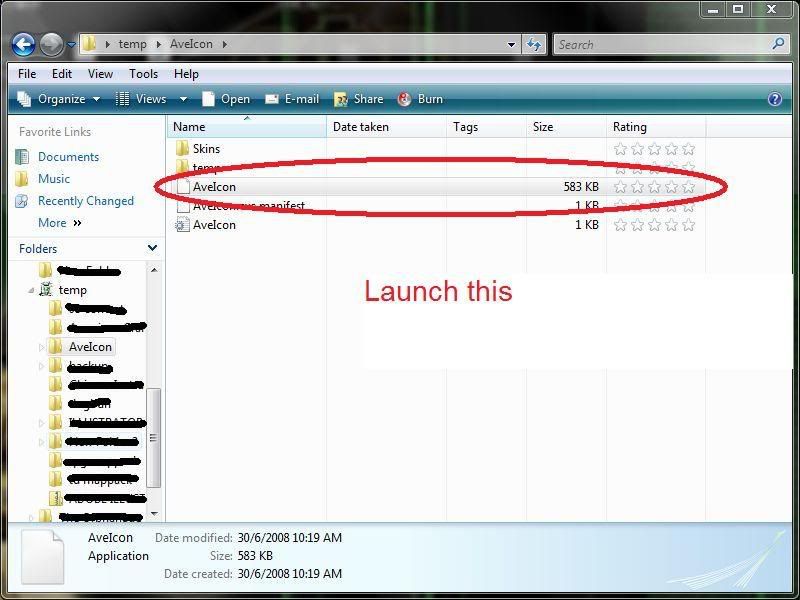
First, download and extract every files into a new folder. Launch the AveIcon.exe in the folder. No installation is required, it's a stand-alone program.

click to enlarge

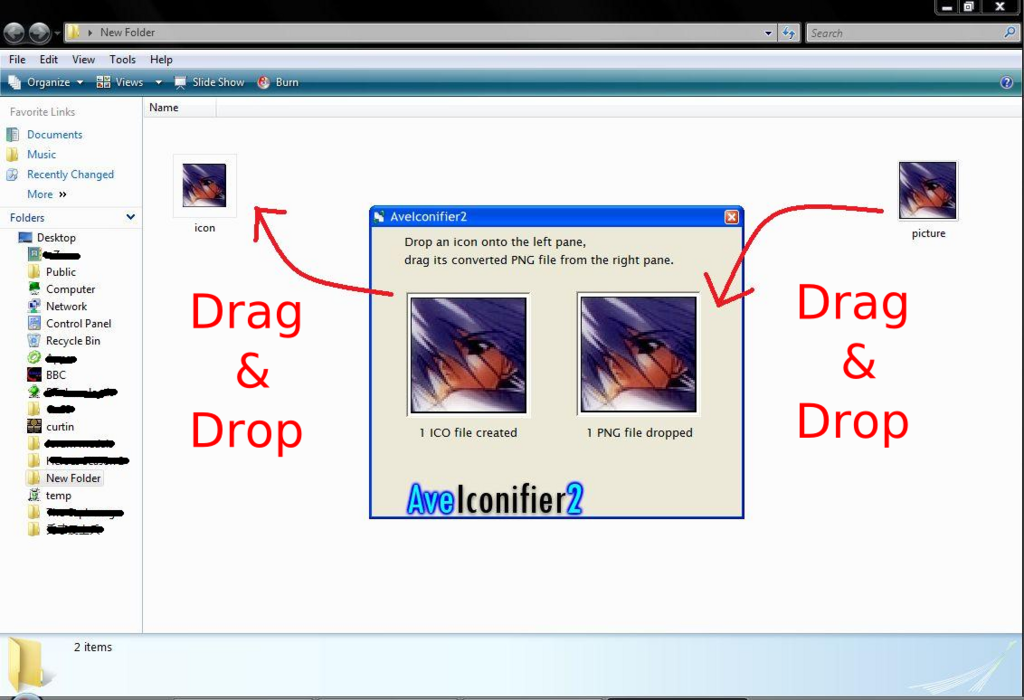
Just select the image you wanna convert (better be croped into square, or else the icon will be stretched. The online image resizer offer image cropping). Drag and drop onto the right frame, the program will then generate the icon onto the left frame, drag and drop the icon from the left frame onto windows explorer, and that's it. Simple.

click to enlarge

The same goes to converting icon into image, just drag and drop the icon file into he left and drag and drop the image from the right.


How to change the skin?
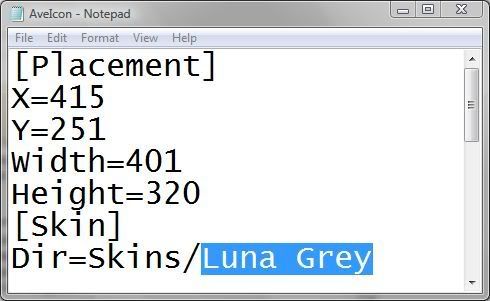
Right click the configuration setting AveIcon.ini open with notepad, change the Skins/Default into the skin you want to change, for example Luna Grey.

click to enlarge


Save it, done. The AveIconifier now have a new skin.

click to enlarge

30 June, 2008

How to remove the "invisible" folder mentioned from previous post?

Ok, I've receive quite an amount of messages regarding on the deletion of the invisible folder I mentioned from previous post. Well, as some may know (and experienced), after you create the "invisible folder", you can't move/rename/delete it using the normal way. Well, this could be an advantage on protecting your files, but it could be a problem too, I know.

So, now I'll explain in detail, on how to move/rename/delete the invisible folder. If you know how to do these steps, just click on the next step to skip on below.
Step 1: Open command promt
Step 2: Change directory
Step 3: Rename (important!!!)


Step 1: Open command promt
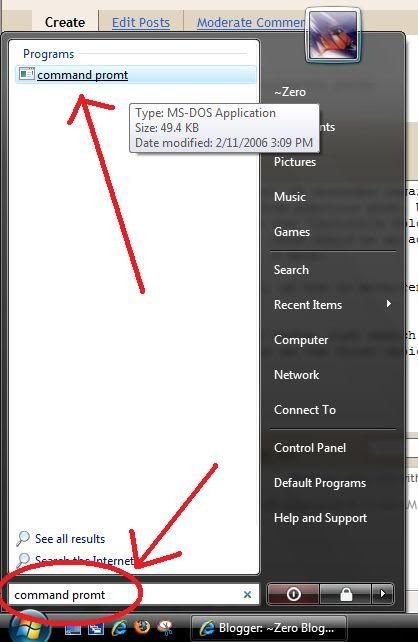
First, open command promt. For Windows Vista, just search for 'command promt' in the startbar and it should come out as the first choice. For Windows XP, go Start -> Run, and type in "cmd" and click ok, the command promt will come out.

Windows Vista:
click to enlarge

Windows XP
click to enlarge


Command promt in both Vista and XP will look the same, so just continue.

Step 2: Change directory
The command for change directory is "cd". So just cd to the directory you put your folder in, for example: in vista, if your invisible folder in on the desktop, just type in "cd desktop" and enter, the line will change from "C:\Users\yourname>" into "C:\Users\yourname\Desktop>". See screenshots below.

Before:
click to enlarge

After:
click to enlarge

You can check whether you're in the right directory or not by using the "dir" command.

Step 3: Rename
This step is very important. It may looks confusing, but actually it is very simple.

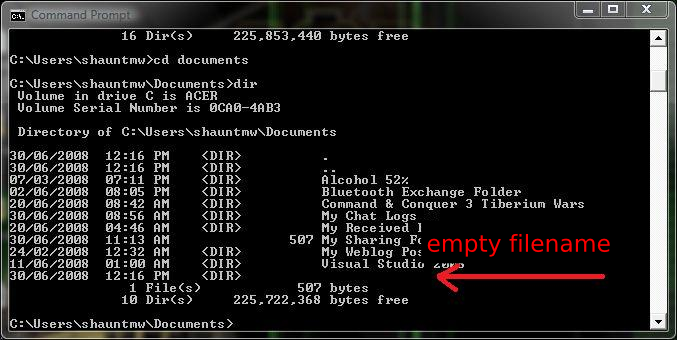
Make sure you're in the right directory. Again, you can check all your files and folders in the directory you currently in by using the "dir" command. If you're in the right directory, an empty name folder should be on the list of the "dir".

click to enlarge

When you're in the right directory, just type in "ren " " asd" and enter. THE SPACE BETWEEN THE QUOTES ARE THE ALT+0160, NOT A NORMAL SPACE.

Once this is done, you should see the invisible folder now have a filename "asd". You can move/rename/delete the normal way using windows explorer, and no longer need the command promt anymore, just close it.

If you wanna revert it back to invisible, just follow the same step on how you made it invisible in the first place. If you can't remember (or just want to make sure), you can refer back to my previous post: Make the folder invisible to hide "important" files

01 June, 2008

Make the folder invisible to hide "important" files

Everyone have some files that they would rather keep private (especially guys). One good approach is to bury them deep within those system files, but this makes access to the file rather complicated and inconvenient. Now I'll introduce one method that could make your folder invisible (but not hidden), that the files are invisible but still accessible in one or two clicks away.

This method will make your folder invisible. it will be visible only when it is highlighted, so to prevent anyone from accessing the folder by chance, try to tuck the folder to the corner or in a folder people less access. See below:


Ok, to do this, just follow the steps below:
1) Create a new folder

2) Rename it. Highlight the new folder and press F2 button, hold down Alt and type in 0160 using the numpad, then release. You won't see the numbers, you will see a blank space after you release the Alt button.

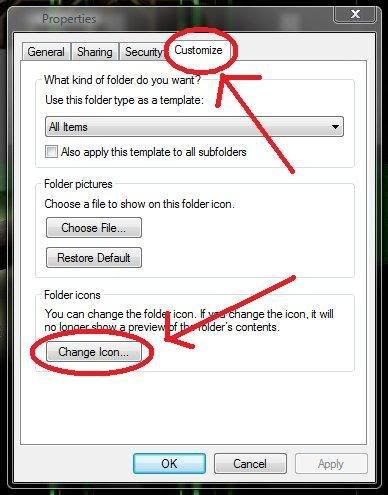
3) Change the icon. Right click the folder, properties, customize, change icon, select a blank icon and click ok.

click to enlarge


So that's it. You can throw your "private" thing inside, and you can simply access to them by double clicking the folder. I'm sure you know the location of the invisible folder, don't you?

Click here for a tutorial on How to remove this invisible folder?

16 March, 2008

Tips for an organized desktop

Shortcuts, Files, Folders etc. filled up your desktop? Does your desktop looks so messy, that you wouldn't want to show to others? If you had a messy desktop, how are you going to show off your cool wallpaper?

So, here's a tip for an organized desktop. Once it is done, you will only have minimal items on your desktop. Depends on your reference, you may even have only 2 things, one recycle bin, and new folder on your newly organized desktop.

Step 1: Determine which application you use most
First, you have to decide which application you use most in your everyday life to be inserted in the Quick Launch bar. For me, I will surely open IE and Firefox everyday. My Windows Live Messenger are on startup auto run, so I don't need it for Quick Launch. I do also do screenshot quite often, so ScreenHunter will be my choice.

You may wanna put in text editor if you're using it everyday. Gamers may wanna insert their games. You don't need to put media player in it even if you use it everyday. Double on the media you wanna play will bring out the media player, no need for manual launch.

Step 2: Managing Quick Launch
First, delete everything from the Quick Launch. Next, right click the shortcut of the applications you wanna add into Quick Launch, and select [add to Quick Launch].

Less than 10 applications is recommended. Too full may shorten your taskbar.

Step 3: Managing Applications
Right click on the desktop, and open a new folder. Name it whatever you like. I named mine [Apps].

Open the new folder, cut and paste every application's shortcut into it. You can also organize them into sub folders. Once you move every shortcut, your desktop are left only files.

right click on the taskar, and select Toolbars > New Toolbar...
Select the new folder you created on the desktop.

Step 4: Organize your taskbar
Right click on the taskbar, select properties, go to [Notification Area] tab, click on [Customize...], and hide everything that you don't want it to appear. Once it is done, click OK and close the box.

Right click and untick the [Lock the Taskbar]. Move your taskbar for all Quick Launch icons to appear. Move the new Toolbar to the righ end, so that the ugly yellow folder icon will disappear, and two arrows ">>" to come out instead.

Step 5: DONE!
Right click on the taskbar, and tick back [Lock the Taskbar].
Finalize what you want to do with your desktop, like moving other unorganized files into your other folders. Add some folders that you want it to be on the desktop for easy access. And that's it.

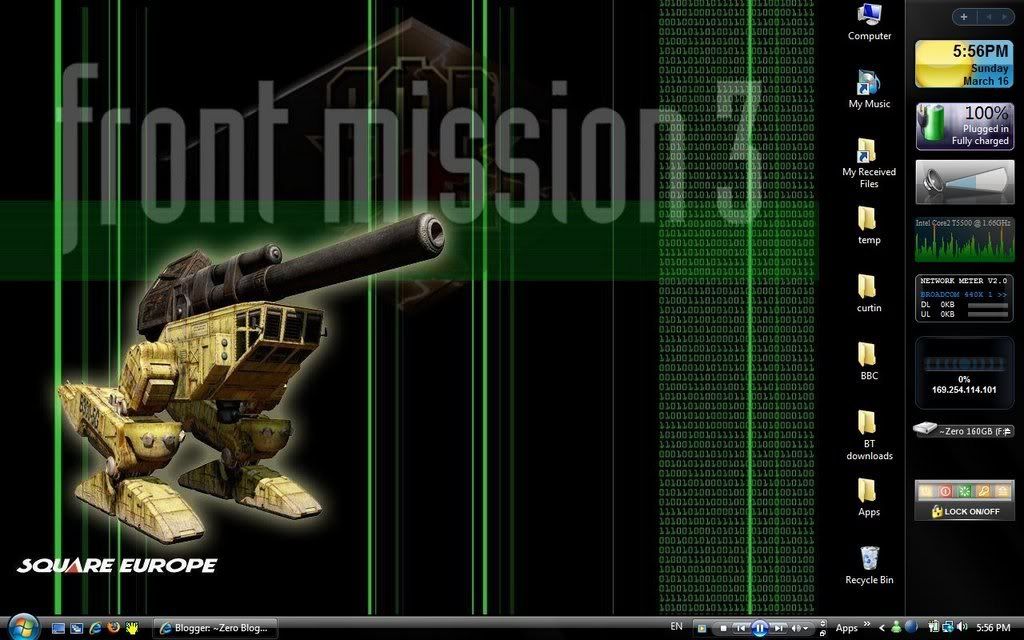
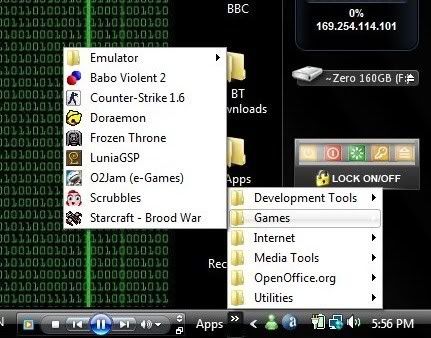
Below is how my desktop looks like.

click to enlarge


click to enlarge


Geeky enough?
Hehe, at least it looks organized.

Happy organizing~